Multiple Exclusive Invisible Private WordPress Categories? It Can’t Be Done. Here’s How I Did It.
My father always says “The difficult can be done right away; it’s the impossible that takes a little longer.”
So when I was told it couldn’t be done, I never thought of not trying and instead it became a challenge.
A WordPress client of mine needed to have several groups of pages and posts, each only visible to particular users. And she didn’t want the expense of a multi-site or BuddyPress. To be specific for point of example, it was a teacher’s site to be used by students of various classes she taught, and only students from a specific class would have access to the class content (posts, discussion, uploading of assignments, etc.). Oh, and she didn’t want any of the class pages or posts visible to anyone except a member of a class, and only their class and no one else’s.
There is no plugin that does anything like this and no combination of dashboard settings will even come close. Even geeks du force at the local WordPress user group just scratched their heads and said “it can’t be done”. So I broke down the necessary process into the various conditions necessary to get this done, finding plugins for each, and hoping their combined functionality would fulfill the requirement. And after researching and testing plenty of such plugins, I got it to work. Here’s I how did it:
- I installed the User Role Editor plugin. This enabled me to create a user role that could be assigned a user based on what group (class) they are in. But this requires there to actually be groups, so …
- I installed the User Access Manager plugin. This enabled me to create user groups (one for each class), associate it with a role (with their respective class in step 1), and assign permissions to groups on a page-by-page (or post-by-post) basis.
- I installed the Private Pages plugin. This makes pages invisible to people not logged in, and is based on user role permissions, which is why additional roles had to be created, not merely user groups.
- I installed the Posts for Page plugin. Because we didn’t want the categories visible (not just the posts), we needed to list the posts on a page. This plugin uses a shortcode to do just that. This means I could create a private page for listing the posts of each category (associated with a class’s respective coursework).
Whew! The kicker is that I had no idea for sure it was possible and so did not quote (and therefore did not bill) the client for it. I’m glad I have bragging rights. But the next time someone needs such a complex setup, they’re going to make at least a few mortgage payments for me.
Mind you, if you as a developer need to set this up yourself, you may not need all the plugins. For example, if you don’t care about the visibility of the pages and posts in navigation and only want to content private (with a message saying you don’t have permission), you can skip the last two plugins above.
To recap, here are instructions how to use the system as I set it up above, the plugins having been installed and configured.
To set up a page and/or posts visible only to certain users
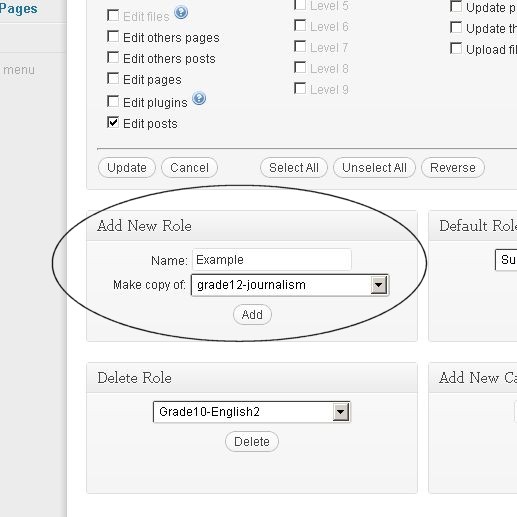
- Go to Users > User Role Editor and scroll down to Add New Role. Set ‘Make copy of’ to whatever permissions you want to give them. Once you Add it, you can tweak the permissions in great detail using the ‘Select Role and change its capabilities list’ on this same page. (In this example, I tweaked the first class role and when I made new ones, I used existing customized class roles to ‘Make copy of’.)
- Go to UAM> Manage user groups and scroll down to Add user group. I recommend naming it the same as the user role you just created, and then select that role under ‘role affiliation’ below. (Don’t worry about the other settings unless you have a good reason to.)
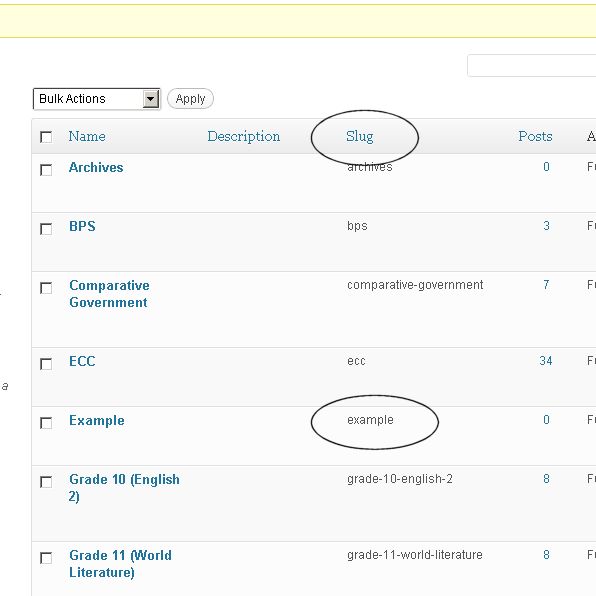
- Go to Posts > Categories and create a category for all the content for a role/group (class in this example). I recommend using the same name as above for consistency. I don’t worry about the group affiliation (‘Set up usergroups’ setting) and it doesn’t seem to matter.
- Once you create the category, it will be listed to thee right, where you can copy the category’s “slug” to paste the next step.
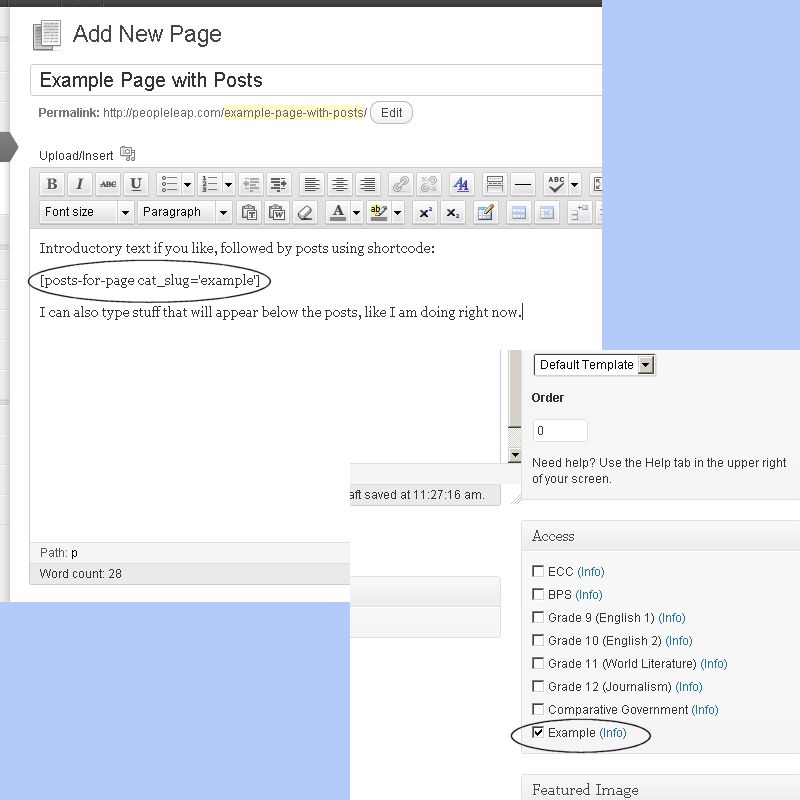
- Go to Pages > Add New and before or after you enter any static content, you can add the shortcode for the posts in the category associated with the role/group (class in this example). The code is [posts-for-page cat_slug=’xxx’] where xxx would be replaced by the category slog from step 4.
- Before publishing (or updating) the page, scroll down to Access and select the role/group associated with the page.

You may not care about visibility in navigation, so some of this is not necessary. However, if you want to shift between visible and invisible with the above setup, here’s how.
Making navigation links of private content visible (and invisible again)
- Go to Pages > All Pages and select to edit the page you need to change visibility. (You can also click ‘Edit Page’ on the front end if logged in.)
- Scroll down to Access and find the role/group associated with the page. If it is checked, it will become invisible except to them. If unchecked, it will be visible in the navigation.
- Click Update and you’re done!
Please note this is being written months after installed and I’ve only worked with it a few times, so I may update this information with further tips or to correct inaccuracies.